By Admin
27 December, 2022
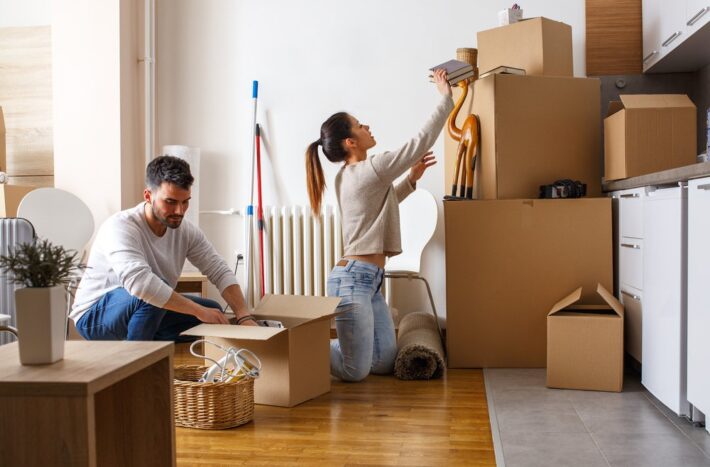
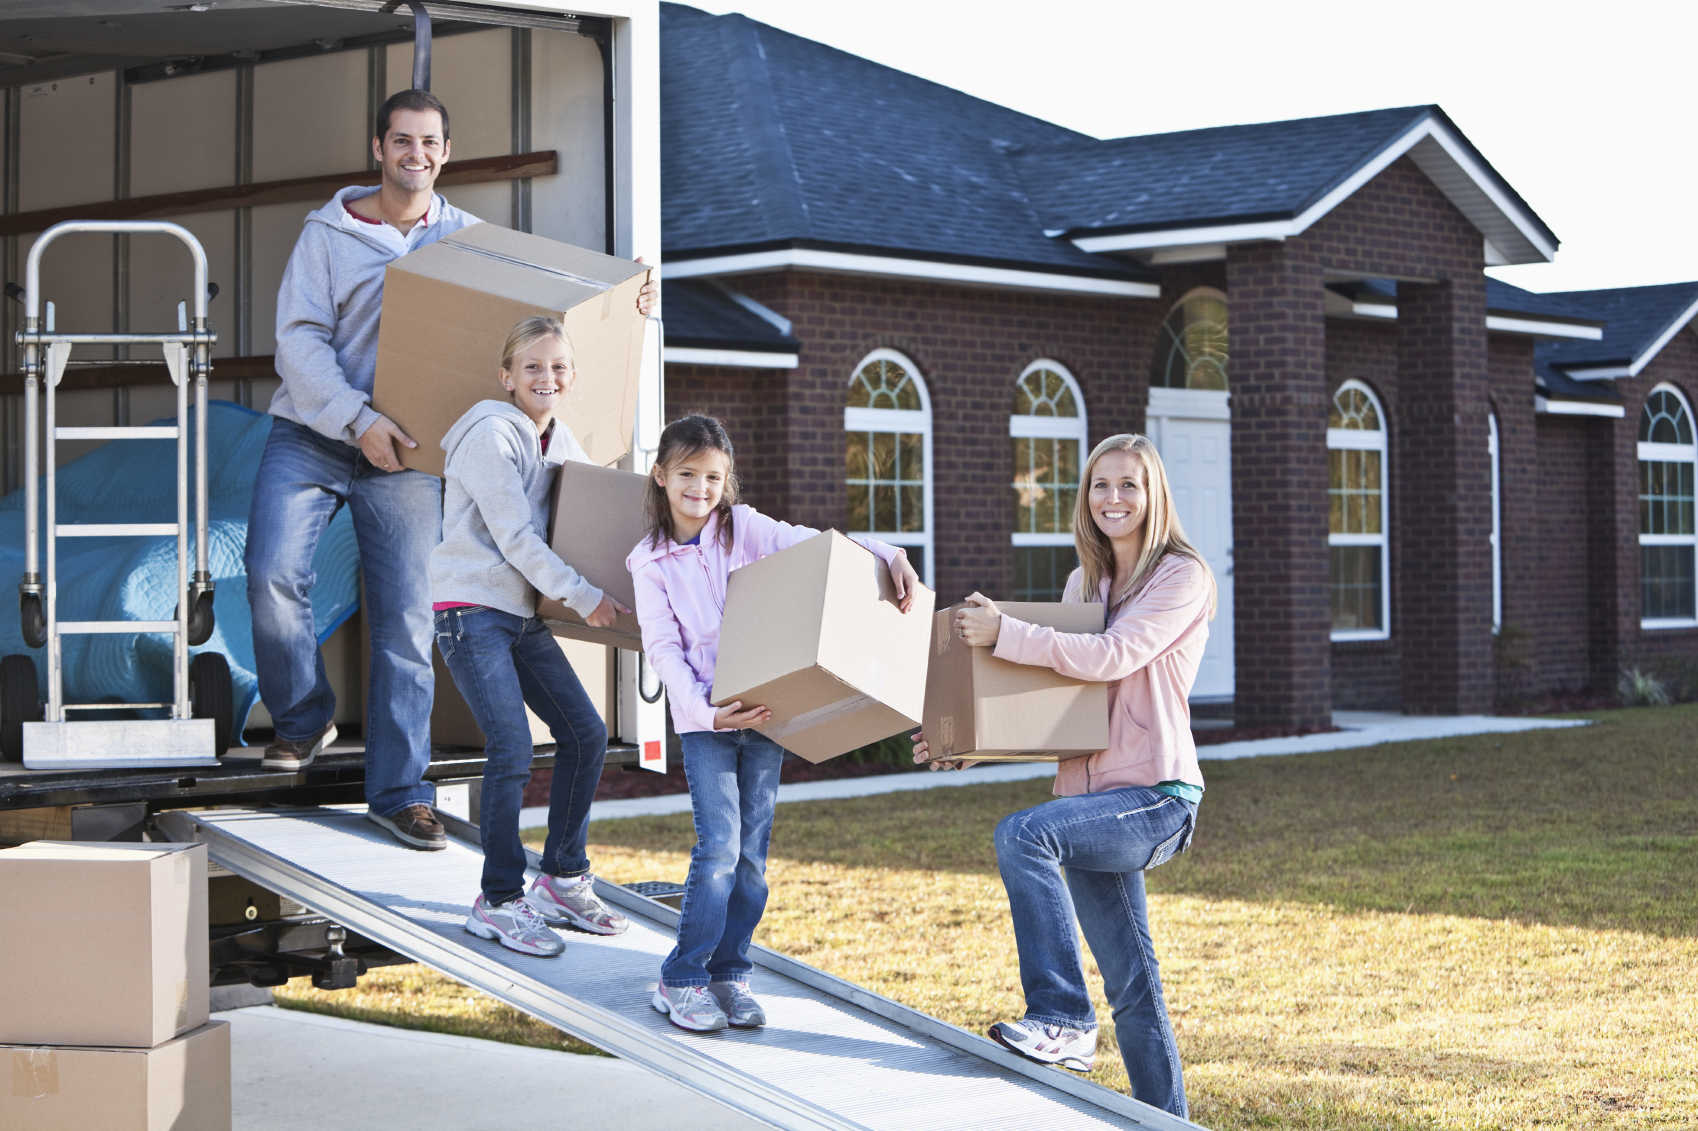
When deciding how to pack for moving, start by getting ready as early as possible. Packaging is often the most time consuming part of the whole process. With careful planning, patience, and an honest assessment of your physical capabilities, budget, and how much you need to transfer (and what you can opt out of), transfer fees can be pain-free. stress. Read our expert advice on how to pack for the move.
Start by gathering your moving supplies
We recommend using our packing calculator before purchasing or purchasing any material to get a clear idea of what you will need in terms of packaging materials. Prepare the surface for the packing station. It can be a folding table or an extra bedroom. All packing materials will be stored here and you will also seal and mark the boxes. When buying boxes, keep in mind that you will need different sizes plus some special boxes. Professional shipping boxes come in a variety of shapes and sizes, perfect for a variety of household items. Consider wardrobe boxes for hanging clothes, bank boxes for home offices, mirror boxes and wall art; and original boxes for TVs, electronics and home appliances (if you already keep them). To save on packaging materials, see if you can get them for free. Some places to find free packaging supplies are your local store, your office, and online stores like Facebook Marketplace and Craigslist. Ask friends, relatives, and neighbors, especially if they just moved in. The boxes in particular are easy to find.
Before you begin
Getting started can seem like a daunting task, but don't put it off until later. Don't wait to get started and be flexible by packing at least a few boxes a day starting in the weeks before you move. Pack the least important things first. It will take you longer than you think, and the longer you wait, the busier and more stressful your move will be. You can use our migration checklist or create your own, but you'll need some sort of checklist to guide you through and before the move. As new tasks appear, add them to the list.
Donate or throw out any items that you don’t want to move with you.
Go through your belongings room by room. Closets, cabinets, drawers – look at everything and note which items can go. Think honestly about what furniture isn’t worth moving.
Toss, donate or sell? Organize the belongings you’re letting go of in these three categories. You can do this either by making mental notes or writing them down on sticky notes.
Do a closet purge. Look at all your closets and pull out anything that is soiled or damaged, doesn’t fit, is out of style, or you haven’t worn in a year.
Get rid of items you wouldn’t buy again. Ask yourself if you’d spend money on the item in question if you didn’t already have it. If you wouldn’t, you likely don’t need it.
Hold a garage sale.If you have the time and energy, consider hosting a garage sale. Inform people with signs, flyers and social media, invite your neighbors, set a fair price and list all the good stuff you no longer need. Organize an attractive display of your products, provide snacks and be ready to negotiate.
Sell what you can. Your carefully used clothing, electronics, furniture and other household items can be sold in many places. ThreadUp, Poshmark, or your local thrift store will pick up your clothes. Sell your electronics online on sites like eBay or trade them in on Amazon for gift cards. Household items, including furniture, can be sold locally through Nexdoor, Facebook Marketplace or any app (try OfferUp).
Make donation pickup arrangements. If you're donating any large items like furniture and carpets, schedule a pick up with the organization in advance. Check out the list of charities that will accept your donation. And keep all receipts for your contributions because you can claim them on your next tax return.
Consider short-term storage. If you can't commit to getting rid of some items yet, but you're not sure you need them, you can store them in short-term storage and then evaluate them later.
Hire a junk removal company. If you're drowning in stuff, consider enlisting the help of a professional garbage disposal company. They can clean out the garage, basement or attic and take out heavy items you don't need, such as mattresses or sofas. They will also clean, take out the trash and even donate your belongings to local charities.
Make a moving folder/Make an inventory of the items you plan to pack
Being organized reduces the stress of moving. Remember when you used to go through rooms and write down what you had, what to move and what to get rid of? It's your inventory. It is best to save your notes on paper or print them out on your smartphone, as you will be making changes, sharing them with movers and consulting with them when decision to move house. Specify a folder or file where you can put all your migration documents. Get a notebook and use it as a notebook for all your notes, checklists, inventory (unless you're more digital), passing questions, and more.
Pack as far in advance as possible
As we mentioned, procrastination will eventually backfire on you. Think realistically about how much you will need to pack everything, and add a little more in case of unexpected delays or setbacks. Our removal checklist recommends ordering all of your moving items six weeks in advance.
Five weeks before the move-out date, develop a packaging process strategy. This means planning your packaging process and what you consider unimportant. These typically include books, home furnishings, electronics, seasonal clothing and sports equipment, and seasonal decorations. They will be packed first. Be prepared to pack utensils, dishes, clothes and toiletries last. We recommend starting packing four weeks before moving. Be sure to pack all fragile items carefully and label the box as clearly as possible. Keep valuables and important documents separate, as you will most likely carry them around.
Start packing items room by room, and clearly label everything.
Focus on one area of the room at a time, and don't mix items from different rooms in the same box. To avoid losing small jewelry and small items or accidentally discarding them with wrapping, wrap them in brightly colored tissue paper and/or label each packaged item. You can also color your boxes with a color sticker for each room. Assign a color to each room and stick to it. (This advice is in line with our recommendation not to mix pieces from different rooms.)
Clearly label your moving boxes with the destination room, the contents of the box, and whether they are fragile. Example: “Living room. Picture frames. Fragile." Label the top and sides of each box for better visibility. Marking boxes as fragile is especially important if you've hired workers to do the move, as they won't know how to be extra careful.
How to pack for moving, room by room: Packing checklist of items for each room of the house
It makes sense to organize and pack things by room and based on their general purpose. For example, to collect all the books from the living room together or all the dishes from the kitchen. This way the unpacking will be much easier. Just make sure to clearly label all your boxes. For more tips on how to pack each room, read our '94 ways to move faster, easier, and stress-free'.
Packing the kitchen
Pack the kitchen last. Of course, you can tuck away your less-frequently used appliances, but you’ll be using things like plates and forks during the days leading up to the move. Leave them for last.
Pack liquids together in plastic bins. The best way to keep your valuables safe from liquids on the go is to pack them together. To prevent leaks, cover the oil and sauce openings with a piece of plastic wrap. Remove the top, place on the foil and return the top. Wrap the top with plastic wrap or use an airtight plastic bag for extra protection. If you are using cardboard, use a trash bag to line the box. We recommend using plastic containers for liquid packaging. Unlike cardboard, you don't have to worry about spilling liquid on other items. Plastic ensures that spills are completely collected and containers can be cleaned and reused. If you don't have a plastic container but want to buy one, start your search with the top eight plastic container shipping companies.
Pack glasses and stemware into boxes with dividers. This is the safest way to transport them. You can buy specialty dividers that fit into standard boxes or use the liquor store boxes in a pinch. Wrap each glass in packing paper and don’t stack anything on top of them.
Defrost and clean your fridge. Don’t forget to defrost and clean your fridge a day or two before the move.
Prep your large appliances (if moving them). Unplug them, remove any hoses, and tape all doors shut. Check out our tips on how to move a stove or range, how to move a refrigerator, and how to move a dishwasher for a complete look at safely moving all of your appliances to your new home.
Use pots to hold small items. Instead of wasting additional boxes for small kitchen items like spices and gadgets, fill up your large pots and other sealable containers with them.
Pack plates vertically. Packing your plates vertically will ensure they’re less likely to crack or break. Don’t forget to wrap them well to use foam pouches.
Put essential appliances in laundry baskets. Put small appliances you’ll need right away (like your coffee maker and toaster) in a laundry basket so you can put them on your counter right away in your new place.
Stack your pots and pans. Use a large or medium box to stack pots and pans. Put packing paper between them. Stuff paper or dish towels into openings to keep your pots and pans from moving around in transit. Wrap glass lids and put them in a separate box.
Wrap your utensil tray. The easiest way to transport flatware and serving utensils is to wrap the tray in plastic wrap and lay it flat in the box. You can add things on top.
Wrap knives in dish towels. Roll each knife in a full sheet of packing paper and then wrap a dish towel around them and secure the whole thing with a rubber band. Pack knives on their side — never facing up.
Packing the dining room
Disassemble furniture.If disassembling doesn't do the job for you, you can proceed to disassemble the furniture yourself by removing the legs from all tables and chairs. Wrap your feet in bubble wrap for protection. After removing and screwing the pins, place the device in a resealable plastic bag, label and tape it to the bottom of the appropriate furniture. If you don't use professional moving services, protect your belongings as much as possible during transport. Cover tables and chairs with a removal blanket and use shrink wrap to wrap (if you can or the carrier can do it for you).
Get the right boxes for your art.If you are moving any statues, large vases and mirrors, or valuable paintings, make sure you do it right. Most large mirrors, paintings, and wall art do not fit into standard boxes. You can get mirror boxes and photos from places like U-Haul. Companies that sell moving items will also have custom boxes designed for large, flat items. These are four separate pieces of cardboard that can be glued together. For artwork that is valuable and irreplaceable, consider uploading the artwork. They're made of durable cardboard, have a plastic backing, and removable foam panels. They are expensive, but you should pack valuables. If you use professional carriers, they should be able to deliver the crate and know how to take care of your artwork.
Disassemble lamps. Remove all the light bulbs from the furniture, then remove the harp. Wrap the base, harp and bulb separately. Place them in a box with plenty of bubble wrap or paper to fill in the gaps in the box. For lampshades, you can use towels, pillowcases, or tissue paper to wrap them. Not rough paper or newspapers as they can damage the curtains. Wrap each lampshade individually, especially if it's made of a soft material like silk. By placing them in the box, you can stack the shades if they are of different sizes. For more information on how to pack your lights, see our lamp packing tips.
Roll area rugs.If you use a shipping company, they will do it for you. You can just leave the rugs on the floor. If you're moving alone, clean and roll up the rugs. They need to be loaded last and unloaded first so they can be placed on the floor in the new home before the furniture is placed on the carpet. To learn more about packing a rug, including how to roll it up, read How to move a rug to a new home.
Fold curtains and drapes. Fold your curtains and drapes lengthwise if you’re using wardrobe boxes. If you’re using regular boxes, line them with paper or plastic bags first to ensure your drapes or curtains will arrive clean.
Take pictures of the furniture that needs reassembling. Unless the movers are reassembling it for you, take pictures of your dining set and any other pieces of furniture that will need to be put together in your new home. That way you’ll have a visual reference. It’s also a good idea to document the “before” and “after” to provide proof of the condition in case something gets damaged.
Packing the living room and den
Remove what you can from large items. When moving large items, remove fixtures or accessories from the large items for easier transport. Some pieces of furniture have removable legs or backs. Take off cushions and pillows from your couch. You can pack them in large boxes or garbage bags. If you’re using professional movers, they might shrink-wrap some upholstered furniture.
Wrap your large furniture in (moving) blankets. Secure the blankets with tape to the furniture.
Empty and secure all drawers. Use masking tape on glass and wood to secure the drawers. Other types of tape may strip the paint and leave a sticky residue.
Gather all product manuals and label the cords for your electronics. When moving valuable electronic devices like your computer, gather all product manuals and place them in a safe, secure bag. Label the cords. Use original packaging if possible.
Take a picture of the back of your TV. It can be difficult to remember where all those wires go. While your TV is still plugged in, take a picture of the back of it so you’ll remember how to set it back up later (we discuss how to pack a TV for the move below).
Back up your computer’s hard drive. Should any damage occur while in transit you can prepare by backing up your hard drive.
Use plenty of protective materials for your fragile items. Use blankets, towels, packing paper and bubble wrap to fill the space in the boxes for your wall art, mirrors and other fragile items. Don’t forget to label them as such.
Packing the bedroom(s)
Pack your guest bedroom(s) first, then your kids’ and your own. The guest bedroom can be packed in its entirety. For the bedrooms in use, pack anything you won’t be using till after the move first and leave the everyday essentials for later (some of which will go into your essentials bag, more on that below).
Disassemble any furniture that can be taken apart, just like you would for any other room.
Wash any dirty clothes before you pack them. If you can, use wardrobe boxes and leave the hangers on.
Don’t empty your dresser drawers. Take the drawers out of the dresser, leave the items in there, and secure them by wrapping up the drawer in plastic wrap. If it’s not too heavy, you can leave the drawers in the dresser and wrap up the dresser itself in plastic wrap.
Leave your clothes on the hangers. Keep clothes on their hangers and either group them up and wrap them in large garbage bags or hang them in a wardrobe box.
Roll, don’t fold your clothes. When packing clothes in drawers, roll them instead of folding them to save space. For more tips on how to fold the clothes and pack them into wardrobe and cardboard boxes as well as suitcases, read our detailed guide to “How To Pack Clothes For Moving.”
Use large outdoor garbage bags. They are big and sturdy enough to hold hanging clothes, towels, linens, bedding, stuffed animals and other non-breakable toys.
Use liquor store boxes for shoes. Boxes used to transport bottles have dividers. You can use them to keep your shoes organized. While you’re at it, consider packing your shoes with small items in them to maximize space.
Put a fitted sheet on your mattress to keep it clean. If you’re not using a mattress bag to move your mattress, you can put a fitted sheet over it to keep the mattress clean in transit.
Wash your bedding before packing it up, if possible. You can use large garbage bags for blankets, sheets, pillowcases and other bedding material. Linens can also go into plastic bags, or suitcases.
Use soft clothes like t-shirts to wrap and protect fragile items, just don’t lose track of them. Don’t forget to label the boxes as fragile.
Pack your jewelry into a box with compartments or wrap it in bubble wrap. If you already have a jewelry box, don’t empty it, pack it as is. Don’t pack your really valuable jewelry with the rest. You should move it yourself.
Stuff the hats with tissue paper or soft clothes. Put them on top in the box to prevent crushing.
Packing the bathroom(s)
Time for the second purge. Hopefully, you went through your appliances and accessories thoroughly by now. What about cosmetics and toiletries? If you have time, go through those, plus your hair products, medicines and cleaning supplies and throw out anything that’s broken, expired, rarely used or ineffective.
Pack your necessities last. Toothbrushes, deodorant, hair products and anything else you use daily could go into your moving essentials bag on moving day.
Keep a first aid kit handy. Injuries do happen, so leave your first aid kit easily accessible on moving day.
Wrap a small bit of plastic wrap around things that might spill. Prevent spills in transit by using plastic wrap to secure the lids of soap, shampoo, cleaning supplies and other items you don’t want poured out all over your things.
Pack small items in sealable plastic bags. That way they won’t get lost in transit. If you have a lot of those in your bathroom, you might want to label the bags for easier unpacking.
Line the boxes with towels or garbage bags. For toiletries, appliances and beauty products, we recommend lining the boxes with garbage or towels for extra protection from leaks or breakage.
Use towels to wrap fragile items. Just like with blankets and t-shirts, put your towels to good use by wrapping fragile items from your bathroom in them and filling the voids in the boxes. Don’t forget to label the boxes as fragile.
Pack unused towels in garbage bags or heavy boxes. You can add your towels on top of heavy boxes as they are lightweight, or put them in garbage bags.
Put your jewelry in plastic boxes with compartments or egg cartons. This will prevent tangling and misplacing paired items like earrings. Tape the boxes or the cartons shut when done.
Packing the laundry room
Don’t put off packing the laundry room. You probably want to wash clothes until the moving day. However, you need to prep your washing machine and dryer for the move. And if you have storage or pantry space in your laundry room, that needs to be packed too.
Decide whether any installed large items are worth moving. The washer and dryer aren’t the only items that may not be worth moving. If you’ve installed any drying racks, shelves or hanging rods, consider their condition and ease of disassembling and reassembling when you decide if you want to detach and move them. Often, it’s not worth the extra effort. Instead, purchase new ones once you’re in your new home.
Wrap standalone drying racks and ironing board in plastic wrap. Small rugs can be rolled up and secured with plastic wrap as well on moving day.
Start with smaller, non-essential and seasonal items. Pack anything in a storage or pantry space you won’t need till after you move. Small items like clothes pins, loose buttons or hardware from shelves should be placed in a plastic bag and sealed. Tape the bag with hardware to the shelves for easy reinstallation.
What to do with your liquid hazardous materials. Most moving companies will not transport laundry detergent and other hazardous materials, including bleach and liquid fabric softener. Either use what you can and then toss at the last minute, give them away to a friend or a neighbor, or drive them yourself. They will travel safely if you put each item in a plastic bag, seal it, and put it in a bucket or a wastebasket with towels or rags to fill unused space.
Bundle and secure together your hangers. You can secure the bundle with a twist tie or a rubber band.
How to pack an iron. First, empty the water from the steamer, and coil and secure the cord (a twist tie will work). If you have the original box, use that. If not, use a box of a similar size and place it in a moving box. Next, tape and label the box.
Prepare the washing machine for moving. Make sure he's undressed and clean. Some washing machines have a cleaning cycle, so use that. Or you can use a commercial washing machine cleaner. Leave the lid open for at least 24 hours to dry the tub. Professionals can do the rest, but if you're an artist, keep reading. Turn off
machine, roll the plug and attach it to the back of the machine. Disconnect the water supply hoses from the water supply with pliers. Drain excess water into the bucket. Secure the tube to the device with plastic wrap. Then, install transport bolts or washers on the back of the machine to keep the drum stable as it moves. If you don't have the screws yet, you can buy them online or at a hardware store. Close the lid and protect it with plastic wrap. Wrap the washing machine in a movable blanket and use another layer of plastic wrap to keep it in place.
Prepare the dryer for moving. Empty the dryer. Again, if you hire professional movers you don’t need to do anything past this point. If you’re DIY’ing: With a gas dryer, you’ll need to turn off the gas, secure the gas line with a cap and disconnect the hose. Store the hose inside the dryer drum. If you have an electric dryer, simply unplug it, and secure the cord to the back with packing tape. Next, disconnect the dryer vent house, and put it inside the drum. Wrap the dryer in moving blankets, and use plastic wrap to hold them in place.
Don’t put it off. Sure, no one wants to deal with stacks of dusty mystery boxes, difficult-to-pack stuff like sports and exercise equipment, and sharp and possibly dirty gardening tools. Not to mention, you probably also have a fair share of hazardous materials like paint thinner, pesticides and pool chemicals that have to be disposed of properly. Since it’s probably one of the largest and least organized areas in your home, the garage will likely take a lot of time and energy to pack. That’s why tackling the garage or a storage shed early enough will save your sanity and give you enough time to get rid of things.
Wrap sharp objects in old towels or bubble wrap. Anything with sharp edges, such as shears or spades, should be wrapped well to prevent injuries. You can then put them in cardboard or plastic boxes.
Remove all detachable parts from power tools. This includes the battery pack. Wrap the cord around their bodies. If you still have the original packaging, please use that. If not, heavy cardboard or plastic box will do. Like with sharp objects, use old towels or bubble wrap. Fill in empty spaces in the box with wadded packing paper for extra protection.
Use moving blankets for odd-shaped items. Long-handled gardening and lawn equipment, such as rakes, brooms and shovels can be wrapped in moving blankets and secured with a rope or twine.
Decide which items can be moved unpacked. Other odd-shaped, large items can be moved as they are, such as some sports equipment and bicycles. (Some sports equipment may require specialty boxes.). If you’re moving a lawnmower, you don’t need to pack it, but drain its gas and oil and remove the spark plug.
Put together a moving essentials bag. Pack a small duffle bag or suitcase with the personal items you’ll need access to during your move and right after you’ve arrived at your new place, such as important documents, medications, chargers, basic toiletries, a couple of changes of clothes, etc. For longer moves (for instance, when you’ll be staying in hotels on the road trip), you can replace the bag with a suitcase or several, for each family member, and include more clothes, toys for the kids, etc. In other words, pack anything you and they will need on the road to stay comfortable.
Put together a moving essentials box. The essentials box (or the open-first box) will save your sanity on your first night in your new home. It should have everything you’ll need right after the move, like paper towels, toilet paper, water, paper plates and plastic utensils, and so on. If you’re moving with a small child, you’ll need to add diapers and extra clothes as well as favorite toys and baby food. For pets, you’ll have to have easy access to their food and food bowls, the leash, treats and chews, the bedding, a litter box, cleanup bags, and your pet’s favorite toys.
Put together a tools essentials box. Set aside tools you’ll need for packing other areas of your home and unpacking at your new house. It can either be a toolkit, or you can create your own. You’ll most likely need a drill, hammer, screwdrivers, pliers, wrench, tape measure, touch-up paint, paintbrush and utility knife. Put these in the box labeled “tools essentials” and either move it with you in the car or put them on the moving truck among the last boxes.
Packing up all your belongings can be daunting, but there are ways to make packing easier. These tips will get you ready to get through the process with less stress.
If you can swing it, use boxes designed for moving. They will be able to hold the weight of the items that you will be putting in them. And, if you can afford it, using specialty boxes like wardrobe, art and bankers boxes, will add extra protection for your belongings.
This one should be obvious. Lighter items can be crushed and otherwise damaged. Heavier items on the bottom will also make the boxes less likely to tumble during the move.
Your items can shift and get damaged if they have room to move. Use towels, blankets, t-shirts, foam, etc. to fill the empty spaces.
It will make unpacking a lot easier. Sure, you might end up using t-shirts or towels or blankets to wrap smaller, fragile items throughout the house, but keep track of those by making a note on the box.
Label each box with the room it’s destined for and a description of its contents
Label clearly. On the top and side of each box, write a general description of the contents and the room name. Use different colored markers for each room, which will provide additional clarity for you and your movers. Indicate “fragile” or “this end up” when appropriate.
Tape your moving boxes well
To help your boxes stay together and your items stay secure inside them, use two layers of tape to secure the sides in place. For added protection, put a perpendicular layer of tape on the area where the sides meet the end of the box.
Ideally, you’ll need to crate any valuable artwork. Oversized sculptures, large paintings and fragile art objects all need to be crated. It’s not a DIY process. You’ll need a professional moving company that offers that kind of service. They’ll take care of everything, but do tell the company in advance that you have valuable art.
Take special care packing the kitchen for moving
From crystal wine glasses and fine porcelain plates to champagne glasses and beer mugs, kitchens are especially difficult to organize with so many fragile items. Use a high-quality corrugated cardboard box with compartments for fine china and dishes. First, wrap all bar accessories and glasses in cling film. Use foam spacers and bubble wrap to properly package delicate china, such as porcelain plates, bowls and cups. Pots, pans, kitchen utensils, baking dishes and cutlery must also be properly protected with wrapping paper and/or a layer of bubble wrap. Use small and medium boxes for both heavy and fragile items. If possible, use the original packaging of kitchen appliances and utensils. Otherwise, use a sturdy corrugated box. Wind up all the wires and attach them to the devices. Wrap fragile cans and bottles from your pantry in bubble wrap. And label the boxes as "fragile" and "face up" respectively.
Learn how to pack a TV for moving
The TV is large and fragile, making it difficult to move. They are also expensive, so it can cost a lot to repair or replace them if damaged in transit. Ideally, use the original packaging when shipping your flat screen TV. Another option is to purchase a special box sized to fit your flat screen. Most flat screen TV boxes come with a set of accessories, which means that in addition to the box, they also contain foam pads that can be used to protect the four corners of the TV and prevent the TV from moving during operation. shipping process. Either way, you need a sturdy box to pack your TV. If you don't use a box, use a floating blanket. Although the box is preferred, it can provide the necessary protection if you wrap the TV in cling film and use foam to protect the corners.
Helpful Articles
Preparing for a Commercial Move
Why You Should Work With a Mover
Use a Mover Using Newer Software
Moving Software
The revolution of moving software
tips Movers Moving